Load Distribution Area in SOFiPLUS
The “Load Distribution Area” represents the most general method to apply free loads on a beam grid.
Based on a defined influence area (Load Distribution Area) the software calculates the forces and bending moments of the related support lines and beam elements. Those results are saved in the database permanently.
By applying a load to the “Load Distribution Area” the program performs the following steps:
- Converting the applied load dependent on the load distribution area mesh into nodal loads.
- Converting the nodal loads into support and beam loads.
All available free loads can be assigned to the “Load Distribution Area”, these are:
- Point Loads
- Line Loads
- Area Loads
- Volume Loads
The “Load Distribution Area” Dialogue Box
The necessary input to define the “Load Distribution Area” is straightforward. There actually only three required inputs.
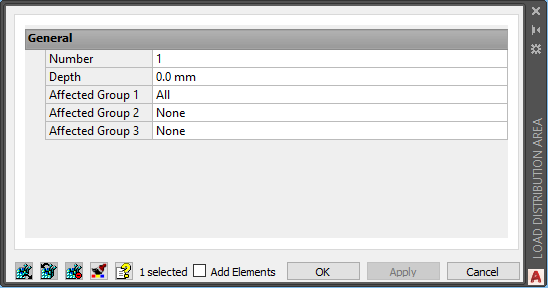
- Number
It isn’t actually necessary to enter a number each time creating a new “Load Distribution Area”, as the software will increase it automatically. However, referring a free load to a “Load Distribution Area” requires selecting it by its number in the load definition.
- Depth
The input defines the depth to consider elements below and above the Load Distribution Area. It points in the positive and the negative direction perpendicular to the defined area.
- Affected Group
To consider all groups, within the range, is the default setting. The “All” input is only available in the first drop-down. However, the two other drop-down menus include a “NONE” input instead. Selecting up to 3 different groups is possible.
Example
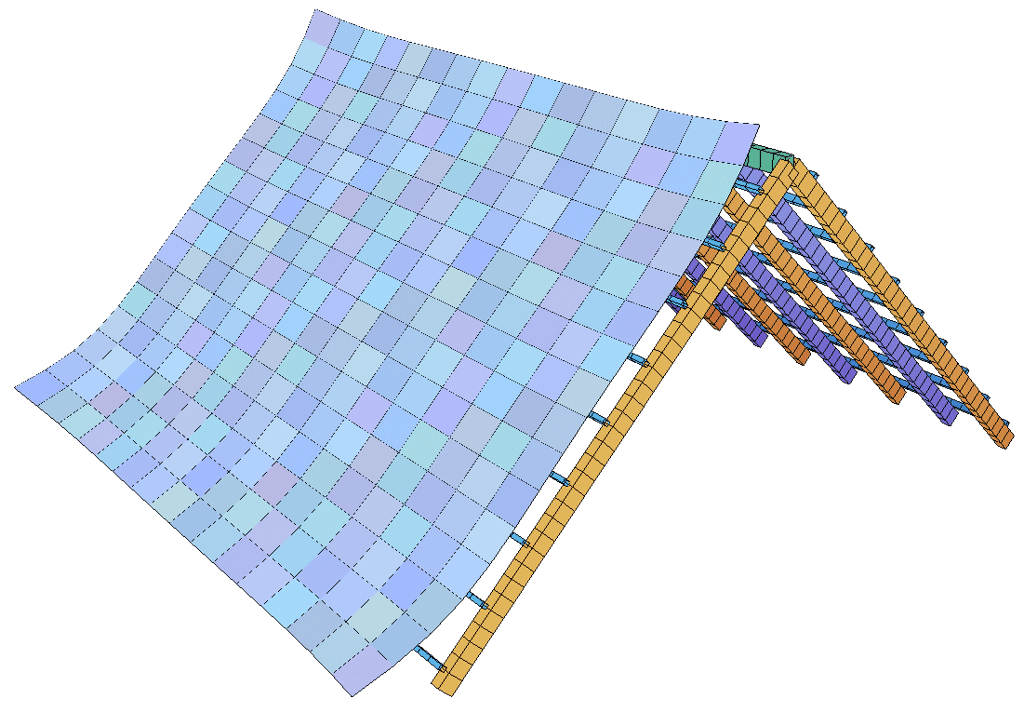
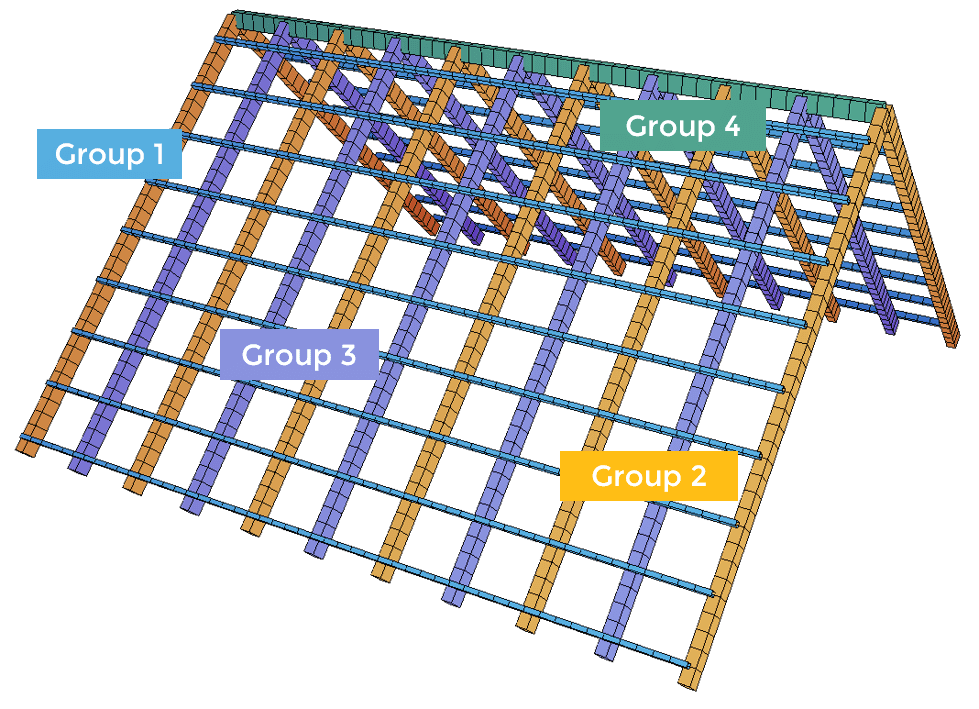
Let’s see how the command works on a quick example. Let’s apply a snow load on a roof truss. The picture below shows the roof truss with its members. The different colours already represent the structural element groups.
- Roof batten – Group 1
- Rafters – Group 2 (odd numbers)
- Rafters – Group 3 (even numbers)
- Ridge Perlin – Group 4 (not further considered in this example)
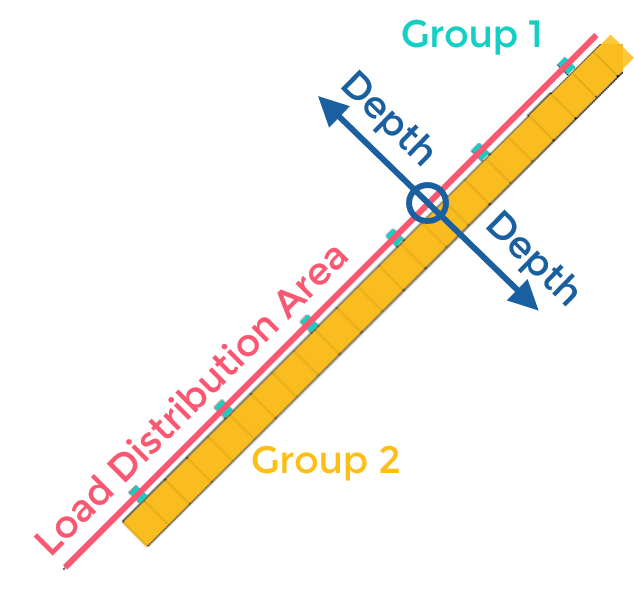
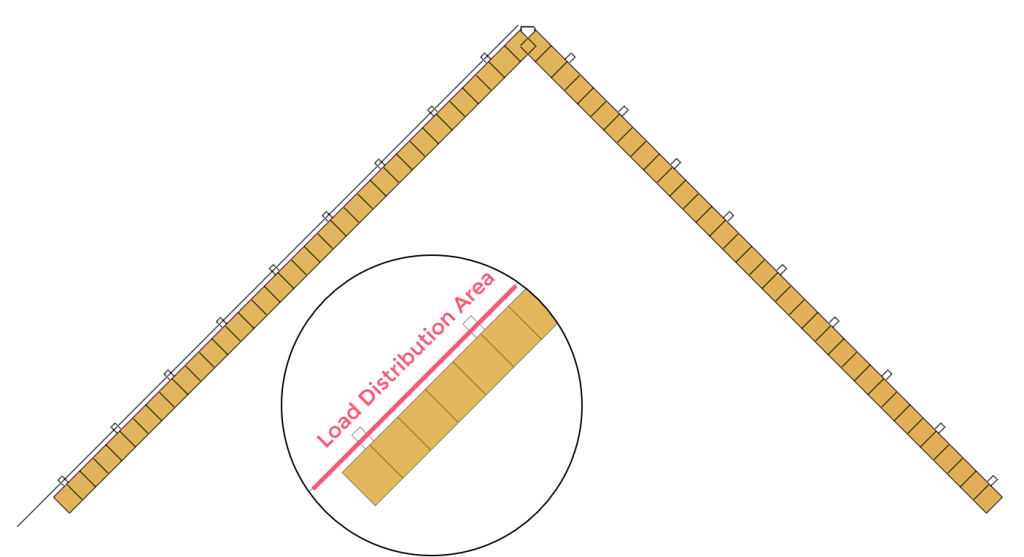
The position of the “Load Distribution Area” is set to the centre line of the roof batten.
1 Create a Load Distribution Area for Rafters (Group 2+3) only
To consider group 2+3 you need to select both groups in the “Load Distribution Area” dialogue box, at the Affected Group inputs. As the position of the Load Distribution Area is at the centre line of the roof batten you have to ensure to define the depth to include the rafters too.

Watch the video to create a “Load Distribution Area”.
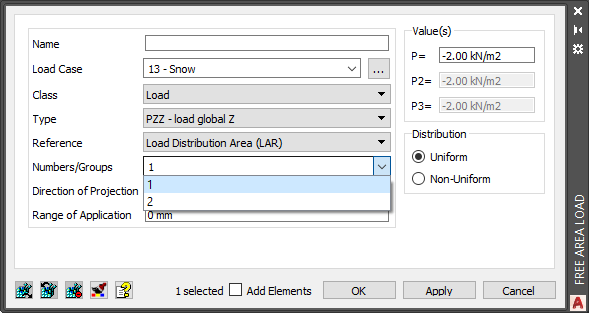
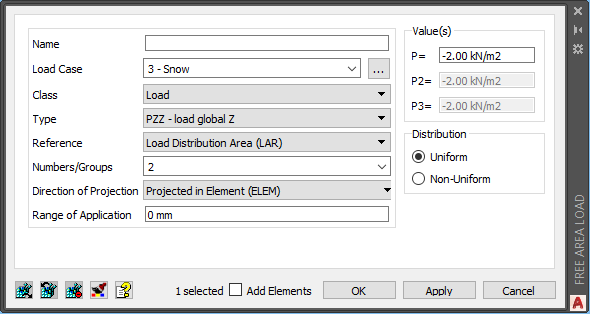
2 Assign an Area Load to the Load Distribution Area
Define the snow load as free area load. Within the “Free Area Load” dialogue box set all properties as usual. When selecting the type of load keep in mind you are going to assign it to a “Load Distribution Area” which comes with a separate local coordinate system. For the snow load choose “PZZ – load global Z”.
To refer to the “Load Distribution Area” select the option “Load Distribution Area LAR” in the Drop-down menu Reference. Now select the number of the “Load Distribution Area” in the drop-down menu Numbers/Groups.
3 Check the distributed Loads in SOFiSTiK Graphic (WINGRAF)
Check the distributed loads in SOFiSTiK Graphic, former Wingraf, to check their values.
Within SOFiSTiK Graphic, former Wingraf, in the sidebar activate the first tab “Structure values, loads, results”. Open the section “Loads” – “Loads related to elements” – “Beam Loads”.
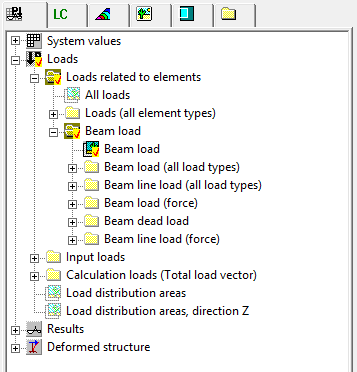
In the second tab “Load/Design cases” select the load case of the free area load from before. In the example, it was load case “3 – Snow”.
You can nicely see the automatic distributed snow load.

Let’S try to change the group number in SOFiPLUS. You can do that by simply changing the properties of the “Load Distribution Area”. Just select group 1 (roof button) instead of group 2+3 as before.


You just learned about how to create a “Load Distribution Area” and assigned a “Free Area Load” to it.
Find further information in the SOFiLOAD User manual in chapter 3.16 LAR – Load Distribution Areas.
Download the “Load Distribution Area” example and practice the workflow.
Wrap-Up
The “Load Distribution Area” command is a useful feature to put loads on systems such as roofs, facades and grillage bridges and lots more structures. The selection of directions for loads is enormous and covers all possibilities to think of.